前情提要:以下操作均使用 root 账户进行。
Linux version 4.20.0-1.el7.elrepo.x86_64 (mockbuild@Build64R7) (gcc version 4.8.5 20150623 (Red Hat 4.8.5-36) (GCC)) #1 SMP Sun Dec 23 20:11:51 EST 2018
清单一览
| 系统/软件 |
版本 |
| Centos |
CentOS Linux release 7.6.1810 (Core) |
| Http(apache) |
2.4.6-88.el7.centos |
| Php |
5.4.16-46.el7 |
| Postfix |
2:2.10.1-7.el7 |
| Dovecot |
1:2.2.36-3.el7 |
| Openssl |
1:1.0.2k-16.el7 |
| Opendkim |
2.11.0-0.1.el7 |
| Roundcube Webmail |
1.2.9 |
| Mariadb |
1:5.5.60-1.el7_5 |
下文中出现的yourdomain.com与192.168.0.1为你的域名和实际外网地址。
列出二级主机头的不可删减,仅列出域的不可增加。
同时提醒,DNS解析和PTR应尽量预先设置好。
设置DNS
Type   Host    Destination             Priority   TTL
MX     @       mail.yourdomain.com     10         3600
A      mail    192.168.0.1                        3600
cmd > nslookup  mail.yourdomain.com 8.8.8.8
服务器:  google-public-dns-a.google.com
Address:  8.8.8.8

非权威应答:
名称:    mail.yourdomain.com
Address:  192.168.0.1

cmd > nslookup -qt=mx yourdomain.com 8.8.8.8
服务器:  google-public-dns-a.google.com
Address:  8.8.8.8

非权威应答:
yourdomain.com       MX preference = 10, mail exchanger = mail.yourdomain.com
设置主机名
[root@mail ~]# hostnamectl set-hostname mail.yourdomian.com
[root@mail ~]# hostname
mail.yourdomian.com
注意,一旦设置主机名在使用apache时default:port默认就是映射主机名,这时需要给默认的配置绑定其他主机名 ServerName
添加主机条目
查看主机条目
[root@mail ~]# vi /etc/hosts
在尾部增加一行条目,对应DNS解析
127.0.0.1   localhost localhost.localdomain localhost4 localhost4.localdomain4
::1         localhost localhost.localdomain localhost6 localhost6.localdomain6
192.168.0.1 mail.yourdomain.com
安装Postfix
[root@mail ~]# yum -y update
[root@mail ~]# yum -y install postfix
在配置postfix之前,我们需要配置SSL,用于加密和保护电子邮件
[root@mail ~]# mkdir /etc/postfix/ssl
[root@mail ~]# cd /etc/postfix/ssl
现在我们必须创建SSL证书。如果尚未openssl安装,则可以使用以下命令进行安装。
[root@mail ~]# yum -y install openssl
现在运行以下命令来创建证书和密钥文件。
[root@mail ~]# openssl req -x509 -nodes -newkey rsa:2048 -keyout server.key -out server.crt -nodes -days 365
需要提供一些信息创建证书
    Generating a 2048 bit RSA private key
    ..........................+++
    ...........................+++
    writing new private key to 'server.key'
    -----
    You are about to be asked to enter information that will be incorporated
    into your certificate request.
    What you are about to enter is what is called a Distinguished Name or a DN.
    There are quite a few fields but you can leave some blank
    For some fields there will be a default value,
    If you enter '.', the field will be left blank.
    -----
    Country Name (2 letter code) [XX]:CN
    State or Province Name (full name) []:GD
    Locality Name (eg, city) [Default City]:
    Organization Name (eg, company) [Default Company Ltd]:
    Organizational Unit Name (eg, section) []:My Unit
    Common Name (eg, your name or your server's hostname) []:mail.yourdomain.com
    Email Address []:master@yourdomain.com
这将生成密钥文件和证书,然后将保存在/etc/postfix/ssl目录中。
现在编辑postfix配置文件,/etc/postfix/main.cf ,将这些行附加到文件的末尾(注意前面不要有任何空格,否则可能无法启动服务)
    myhostname = mail.yourdomain.com
    mydomain = yourdomain.com
    myorigin = $mydomain
    home_mailbox = mail/
    #如果有ipv6的地址下面的内容需要变更为 127.0.0.0/8 [::1]/128 否则可能无法正常收发信
    mynetworks = 127.0.0.0/8
    inet_interfaces = all
    inet_protocols = all
    mydestination = $myhostname, localhost.$mydomain, localhost, $mydomain
    smtpd_sasl_type = dovecot
    smtpd_sasl_path = private/auth
    smtpd_sasl_local_domain =
    smtpd_sasl_security_options = noanonymous
    broken_sasl_auth_clients = yes
    smtpd_sasl_auth_enable = yes
    smtpd_recipient_restrictions = permit_sasl_authenticated,permit_mynetworks,reject_unauth_destination
    smtp_tls_security_level = may
    smtpd_tls_security_level = may
    smtp_tls_note_starttls_offer = yes
    smtpd_tls_loglevel = 1
    smtpd_tls_key_file = /etc/postfix/ssl/server.key
    smtpd_tls_cert_file = /etc/postfix/ssl/server.crt
    smtpd_tls_received_header = yes
    smtpd_tls_session_cache_timeout = 3600s
    tls_random_source = dev:/dev/urandom
编辑 /etc/postfix/master.cf 去掉 submission与smtps的一些注释(对比下列内容,如果没有则需要添加)
#
# Postfix master process configuration file.  For details on the format
# of the file, see the master(5) manual page (command: "man 5 master").
#
# Do not forget to execute "postfix reload" after editing this file.
#
# ==========================================================================
# service type  private unpriv  chroot  wakeup  maxproc command + args
#               (yes)   (yes)   (yes)   (never) (100)
# ==========================================================================
smtp      inet  n       -       n       -       -       smtpd
#smtp      inet  n       -       n       -       1       postscreen
#smtpd     pass  -       -       n       -       -       smtpd
#dnsblog   unix  -       -       n       -       0       dnsblog
#tlsproxy  unix  -       -       n       -       0       tlsproxy
submission inet n       -       n       -       -       smtpd
  -o syslog_name=postfix/submission
#  -o smtpd_tls_security_level=encrypt
  -o smtpd_sasl_auth_enable=yes
#  -o smtpd_reject_unlisted_recipient=no
#  -o smtpd_client_restrictions=$mua_client_restrictions
#  -o smtpd_helo_restrictions=$mua_helo_restrictions
#  -o smtpd_sender_restrictions=$mua_sender_restrictions
  -o smtpd_recipient_restrictions=permit_sasl_authenticated,reject
  -o milter_macro_daemon_name=ORIGINATING
smtps     inet  n       -       n       -       -       smtpd
  -o syslog_name=postfix/smtps
#  -o smtpd_tls_wrappermode=yes
  -o smtpd_sasl_auth_enable=yes
#  -o smtpd_reject_unlisted_recipient=no
#  -o smtpd_client_restrictions=$mua_client_restrictions
#  -o smtpd_helo_restrictions=$mua_helo_restrictions
#  -o smtpd_sender_restrictions=$mua_sender_restrictions
  -o smtpd_recipient_restrictions=permit_sasl_authenticated,reject
  -o milter_macro_daemon_name=ORIGINATING
安装Dovecot
[root@mail ~]# yum -y install dovecot
编辑 /etc/dovecot/conf.d/10-master.conf 找到下面的内容并修改成一致
  # Postfix smtp-auth
  unix_listener /var/spool/postfix/private/auth {
    mode = 0660
    user = postfix
    group = postfix
  }
编辑 /etc/dovecot/conf.d/10-auth.conf 找到如下内容并修改成一致
# Space separated list of wanted authentication mechanisms:
#   plain login digest-md5 cram-md5 ntlm rpa apop anonymous gssapi otp skey
#   gss-spnego
# NOTE: See also disable_plaintext_auth setting.
auth_mechanisms = plain login
编辑 /etc/dovecot/conf.d/10-mail.conf 找到如下内容并修改成一致
# See doc/wiki/Variables.txt for full list. Some examples:
#
#   mail_location = maildir:~/Maildir
#   mail_location = mbox:~/mail:INBOX=/var/mail/%u
#   mail_location = mbox:/var/mail/%d/%1n/%n:INDEX=/var/indexes/%d/%1n/%n
#
# <doc/wiki/MailLocation.txt>
#
mail_location = maildir:~/mail
编辑 /etc/dovecot/conf.d/20-pop3.conf 找到如下内容并修改成一致
# Note that Outlook 2003 seems to have problems with %v.%u format which was
# Dovecot's default, so if you're building a new server it would be a good
# idea to change this. %08Xu%08Xv should be pretty fail-safe.
#
pop3_uidl_format = %08Xu%08Xv
启动postfix和dovecot
 [root@mail ~]#    systemctl restart postfix
 [root@mail ~]#    systemctl enable postfix
 [root@mail ~]#    systemctl restart dovecot
 [root@mail ~]#    systemctl enable dovecot
添加防火墙例外规则
  [root@mail ~]#   firewall-cmd --permanent --add-service=smtp
  [root@mail ~]#   firewall-cmd --permanent --add-port=587/tcp
  [root@mail ~]#   firewall-cmd --permanent --add-port=465/tcp
  [root@mail ~]#   firewall-cmd --permanent --add-port=110/tcp
  [root@mail ~]#   firewall-cmd --permanent --add-service=pop3s
  [root@mail ~]#   firewall-cmd --permanent --add-port=143/tcp
  [root@mail ~]#   firewall-cmd --permanent --add-service=imaps
  [root@mail ~]#   firewall-cmd --permanent --add-service=http
  [root@mail ~]#   firewall-cmd --permanent --add-service=https
  [root@mail ~]#   firewall-cmd --reload
此时可以使用Telnet进行连接测试,以上列出的25和110端口都能连接的话基本上就属于部署成功了。注意,这里建议通过部署SquirrelMail测试收发比较快捷,因为这个程序兼容性比较好并且设置简单。
安装Apache Web服务器
[root@mail ~]# yum -y install httpd mod_ssl php
[root@mail ~]# systemctl start httpd
[root@mail ~]# systemctl enable httpd
默认站点在 /var/www/html 此处省略配置。
添加邮箱账户master并设置密码,注意此处不要使用/etc/aliases里出现的用户名,收信这些邮件会被归档到指定用户下
[root@mail ~]# useradd -m master -s /sbin/nologin
[root@mail ~]# passwd master
使用SquirrelMail测试收发信
[root@mail ~]# cd /var/www
[root@mail ~]# wget http://snapshots.squirrelmail.org/squirrelmail-20190109_0200-SVN.devel.tar.gz
[root@mail ~]# tar -xvf squirrelmail-20190109_0200-SVN.devel.tar.gz
[root@mail ~]# chown -R apache:apache /var/www/squirrelmail.devel
配置httpd以便于访问
[root@mail ~]# vi /etc/httpd/conf.d/vhost.conf
修改/etc/httpd/conf/httpd.conf 增加默认页
<IfModule dir_module>
    DirectoryIndex index.html index.php
</IfModule>
写入以下内容
#First VirtualHost is a default host,

<VirtualHost *:80>
    ServerAdmin webmaster@localhost
    ServerName localhost
    DocumentRoot "/var/www/html/"
    ErrorLog /var/log/httpd/error_log.log
    CustomLog /var/log/httpd/access.log combined
</VirtualHost>

<VirtualHost *:80>
    ServerAdmin webmaster@localhost
    ServerName mail.yourdomain.com
    ServerAlias mail.yourdomain.com
#    Redirect permanent / https://www.yourdomain.com/
    DocumentRoot "/var/www/squirrelmail.devel/"
    ErrorLog /var/log/httpd/mail_error.log
    CustomLog /var/log/httpd/mail_access.log combined
</VirtualHost>
重启服务
[root@mail ~]# systemctl restart httpd
访问你的服务器地址
http://192.168.0.1         访问的是/var/www/html
http://mail.yourdomain.com 访问的是/var/www/squirrelmail.devel
提示我们需要配置文件
[root@mail ~]# yum -y install perl
[root@mail ~]# cd /var/www/squirrelmail.devel/config
[root@mail ~]# ./conf.pl
修改第二项里子菜单的第一项Domain为yourdomian.com,S保存R返回Q退出
SquirrelMail Configuration : Read: config_default.php
Config version 1.5.0; SquirrelMail version 1.5.2 [SVN]
---------------------------------------------------------
Main Menu --
1.  Organization Preferences
2.  Server Settings
3.  Folder Defaults
4.  General Options
5.  User Interface
6.  Address Books
7.  Message of the Day (MOTD)
8.  Plugins
9.  Database
10. Language settings
11. Tweaks

D.  Set pre-defined settings for specific IMAP servers

C   Turn color on
S   Save data
Q   Quit
修改完后应该是这样的,如果第三项不是SMTP那么需要修改为SMTP后保存退出脚本
Server Settings

General
-------
1.  Domain                 : yourdomain.com
2.  Invert Time            : false
3.  Sendmail or SMTP       : SMTP

A.  Update IMAP Settings   : localhost:143 (other)
B.  Update SMTP Settings   : localhost:25

R   Return to Main Menu
C   Turn color on
S   Save data
Q   Quit
我们再一次刷新网站 mail.yourdomain.com ,发现跳转到登陆界面了
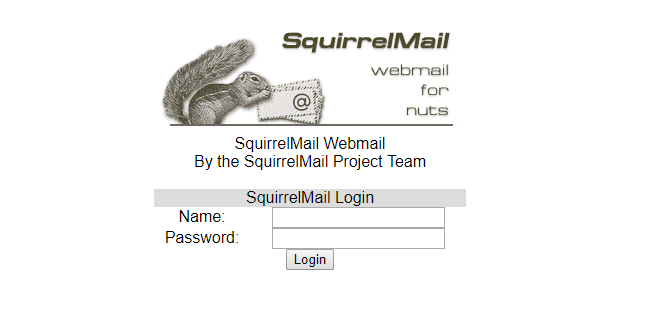
这里我们将使用上面添加的账号master进行登陆发现登陆成功但是出错了,提示路径权限不足
Could not create initial preference file! /var/local/squirrelmail/data/ should be writable by the user that the web server is running as. Please contact your system administrator and report this error.
使用以下方法解决这个错误
[root@mail ~]# mkdir -p /var/local/squirrelmail/data
[root@mail ~]# chown -R apache:apache /var/local/squirrelmail/data
注意,实际上还有一个附件的目录,这里省去了。因为这里只是用于测试邮件服务器是否正常工作,后面部分不会用这套系统。
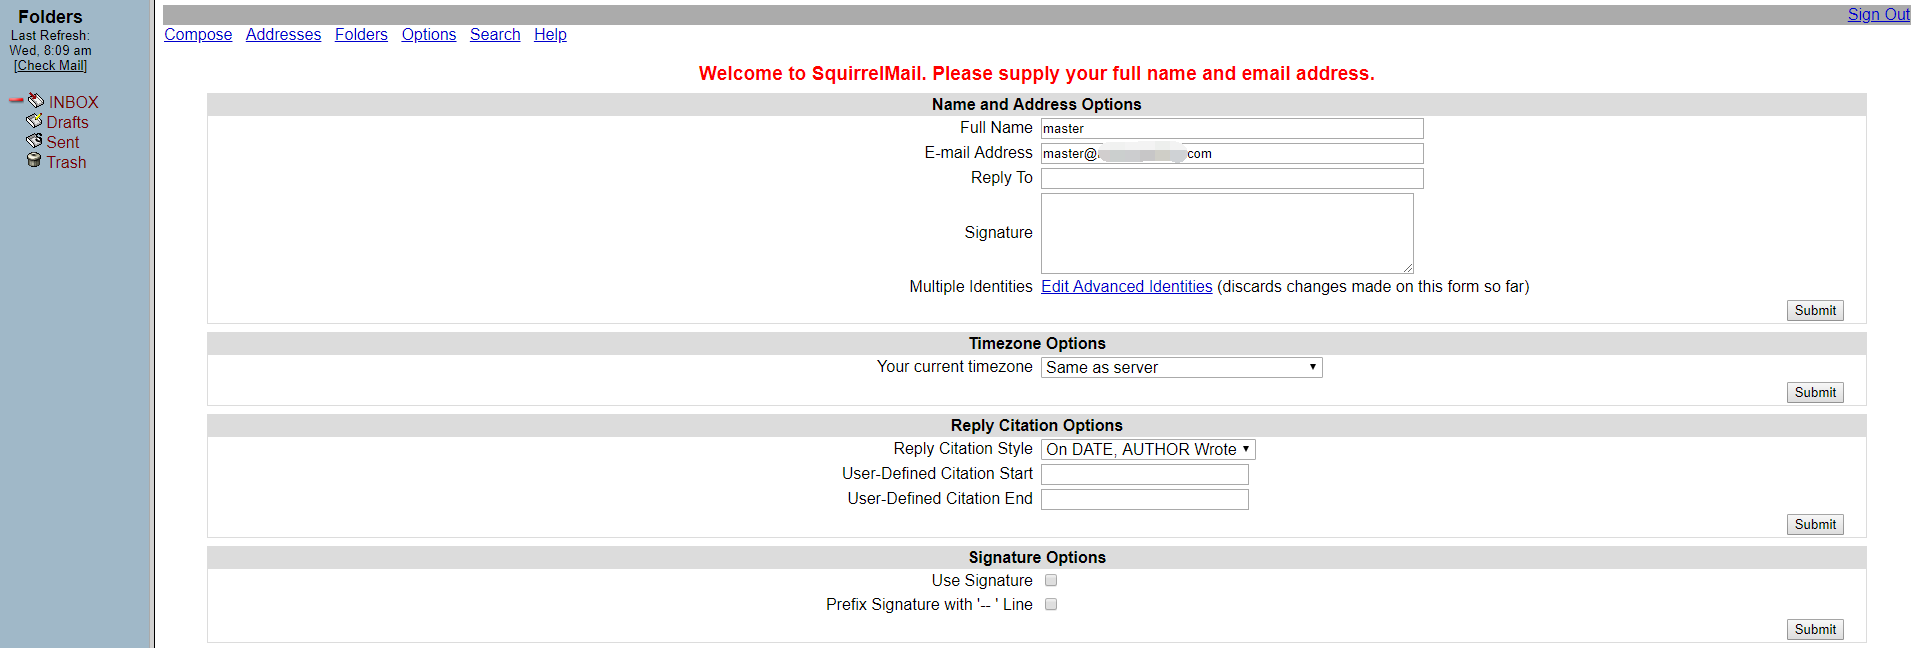
再次刷新页面,登陆成功了,这里需要设置 Full Name 然后提交,这样再次登陆就不会显示这个页面了
测试发信,点击顶部导航栏的 Compose 按钮

点击Send后提示。
Your mail has been sent.
这里建议提示发送成功但是仍然提醒大家查看 /var/log/maillog内是否真的发送成功了。我这边页面提示成功了但是从日志里看显示连接对方服务器超时,这是当前服务器提供商默认关闭了SMTP功能,需要提交资料开通
postfix/smtp[5993]: connect to mail.xxxx.com[97.xx.xx.44]:25: Connection timed out
事实上上述地址是可以正常访问,服务提供商拦截SMTP端口数据防止服务器用于发送垃圾邮件,所以这里进行跳过进行收信测试。
提醒,只要SMTP没有被封堵,正常的情况下是可以发信的。有需要的可以联系提供商提供个人资料进行开通或者选择没有默认封锁SMTP端口的提供商。
收信测试,我通过部署的其他邮件服务器给 master@yourdomain.com 发了一封邮件

maillog 显示收到了来信并放到了收件箱
Jan  9 08:26:26 guest postfix/smtpd[6027]: connect from mail.xxxx.com[97.xxx.xxx.44]
Jan  9 08:26:26 guest postfix/smtpd[6027]: Anonymous TLS connection established from mail.xxxxx.com[97.xxxx.xxx.44]: TLSv1.2 with cipher AECDH-AES256-SHA (256/256 bits)
Jan  9 08:26:26 guest postfix/smtpd[6027]: AD92A205BB: client=mail.xxxx.com[97.xxx.xxx.44]
Jan  9 08:26:26 guest postfix/cleanup[6029]: AD92A205BB: message-id=<e952db7a66032789245f9de951eac7ee@xxxxxx.com>
Jan  9 08:26:26 guest postfix/qmgr[5423]: AD92A205BB: from=<master@xxxxxx.com>, size=1635, nrcpt=1 (queue active)
Jan  9 08:26:26 guest postfix/local[6030]: AD92A205BB: to=<master@yourdomain.com>, relay=local, delay=0.1, delays=0.09/0.01/0/0, dsn=2.0.0, status=sent (delivered to maildir)
Jan  9 08:26:26 guest postfix/qmgr[5423]: AD92A205BB: removed
Jan  9 08:26:26 guest postfix/smtpd[6027]: disconnect from mail.xxxxx.com[97.xxxx.xxxx.44]


自此邮件服务器就已经搭建好了,具备了收发的能力,但是由于垃圾邮件横行的原因,我们还需要配置SPF、DKIM、DMARC进行最大限度的保障我们发送的邮件不会被拦截或退回或丢入垃圾箱中。
设置SPF记录,下面记录含义是所有从A和MX记录和指定IP地址的发信请求都是合法的
Type   Host    Destination                          Priority       TTL
TXT     @      v=spf1 a mx ip4:192.168.0.1 -all                    3600
如果有ipv6的地址那么建议也添加上,因为不同程序发信选择的出口可能不一致,没添加可能出现SPF验证失败
Type   Host    Destination                          Priority       TTL
TXT     @      v=spf1 a mx ip4:192.168.0.1 ip6:X:X:X:X:X:X:X:X -all                    3600
如果使用了ipv6地址,前导可能为0可能需要补齐长度,这里建议使用ifconfig显示的地址
执行下面的命令,如果返回的内容是一致的则说明设置成功,或者也可以通过其他网站提供的检测功能进行验证。
cmd > nslookup -qt=txt yourdomain.com
v=spf1 a mx ip4:192.168.0.1 -all
设置DKIM,需要安装EPEL源,部分服务器可能安装有EPEL源但是默认没有启用需要检查并打开(这里不在叙述EPEL源的安装和缓存更新)
[root@mail ~]#  vi /etc/yum.repos.d/epel.repo

[epel]
name=Extra Packages for Enterprise Linux 7 - $basearch
#baseurl=http://download.fedoraproject.org/pub/epel/7/$basearch
metalink=https://mirrors.fedoraproject.org/metalink?repo=epel-7&arch=$basearch
failovermethod=priority
enabled=1
gpgcheck=1
gpgkey=file:///etc/pki/rpm-gpg/RPM-GPG-KEY-EPEL-7
安装opendkim
[root@mail ~]# yum -y install opendkim
创建密钥,注意如果没有设置主机名的话需要额外的处理生成的密钥(参考文档 2)(备注 1)
[root@mail ~]# opendkim-default-keygen
提示
Generating default DKIM keys:
Default DKIM keys for yourdomain.com created in /etc/opendkim/keys.
[root@mail keys]# cd /etc/opendkim/keys/
[root@mail keys]# ll
total 8
-rw-r----- 1 root opendkim 887 Jan  9 09:07 default.private
-rw-r--r-- 1 root opendkim 321 Jan  9 09:07 default.txt
编辑 /etc/opendkim.conf 使其对应内容如下一致
##  Selects operating modes. Valid modes are s (sign) and v (verify). Default is v.
##  Must be changed to s (sign only) or sv (sign and verify) in order to sign outgoing
##  messages.
Mode    sv

##  Create a socket through which your MTA can communicate.
Socket  inet:8891@127.0.0.1

##  Selects the canonicalization method(s) to be used when signing messages.
Canonicalization    relaxed/simple

##  Domain(s) whose mail should be signed by this filter. Mail from other domains will
##  be verified rather than being signed. Uncomment and use your domain name.
##  This parameter is not required if a SigningTable is in use.
Domain  yourdomain.com

##  Gives the location of a private key to be used for signing ALL messages. This
##  directive is ignored if KeyTable is enabled.
#KeyFile   /etc/opendkim/keys/default.private

##  Gives the location of a file mapping key names to signing keys. In simple terms,
##  this tells OpenDKIM where to find your keys. If present, overrides any KeyFile
##  directive in the configuration file. Requires SigningTable be enabled.
KeyTable    refile:/etc/opendkim/KeyTable

##  Defines a table used to select one or more signatures to apply to a message based
##  on the address found in the From: header field. In simple terms, this tells
##  OpenDKIM how to use your keys. Requires KeyTable be enabled.
SigningTable    refile:/etc/opendkim/SigningTable

##  Identifies a set of "external" hosts that may send mail through the server as one
##  of the signing domains without credentials as such.
ExternalIgnoreList  refile:/etc/opendkim/TrustedHosts

##  Identifies a set "internal" hosts whose mail should be signed rather than verified.
InternalHosts   refile:/etc/opendkim/TrustedHosts
KeyTable
# OPENDKIM KEY TABLE
# To use this file, uncomment the #KeyTable option in /etc/opendkim.conf,
# then uncomment the following line and replace example.com with your domain
# name, then restart OpenDKIM. Additional keys may be added on separate lines.

#default._domainkey.example.com example.com:default:/etc/opendkim/keys/default.private
default._domainkey.yourdomain.com yourdomain.com:default:/etc/opendkim/keys/default.private
SigningTable
# OPENDKIM SIGNING TABLE
# This table controls how to apply one or more signatures to outgoing messages based
# on the address found in the From: header field. In simple terms, this tells
# OpenDKIM "how" to apply your keys.

# To use this file, uncomment the SigningTable option in /etc/opendkim.conf,
# then uncomment one of the usage examples below and replace example.com with your
# domain name, then restart OpenDKIM.

# WILDCARD EXAMPLE
# Enables signing for any address on the listed domain(s), but will work only if
# "refile:/etc/opendkim/SigningTable" is included in /etc/opendkim.conf.
# Create additional lines for additional domains.

*@yourdomain.com default._domainkey.yourdomain.com

# NON-WILDCARD EXAMPLE
# If "file:" (instead of "refile:") is specified in /etc/opendkim.conf, then
# wildcards will not work. Instead, full user@host is checked first, then simply host,
# then user@.domain (with all superdomains checked in sequence, so "foo.example.com"
# would first check "user@foo.example.com", then "user@.example.com", then "user@.com"),
# then .domain, then user@*, and finally *. See the opendkim.conf(5) man page under
# "SigningTable" for more details.

#example.com default._domainkey.example.com
TrustedHosts
# OPENDKIM TRUSTED HOSTS
# To use this file, uncomment the #ExternalIgnoreList and/or the #InternalHosts
# option in /etc/opendkim.conf then restart OpenDKIM. Additional hosts
# may be added on separate lines (IP addresses, hostnames, or CIDR ranges).
# The localhost IP (127.0.0.1) should always be the first entry in this file.
127.0.0.1
::1
#host.example.com
#192.168.1.0/24
mail.yourdomain.com
yourdomain.com
编辑 /etc/postfix/main.cf 文件,在末尾追加
#DKIM
smtpd_milters = inet:127.0.0.1:8891
non_smtpd_milters = $smtpd_milters
milter_default_action = accept
启用DKIM服务
[root@mail keys]# systemctl enable opendkim
[root@mail keys]# systemctl start opendkim
[root@mail keys]# systemctl restart postfix
打开/etc/opendkim/keys/default.txt
default._domainkey  IN  TXT ( "v=DKIM1; k=rsa; "
      "p=MIGfMA0GCSqGSIb3DQEBAQUAA4GNADCBiQKBgQDaJp4t7CUdK925qyqPnNtqM5cSvAfzQJSX3WPafluRBHtB62whHuD7GsKRW4XZmifqnGOtMYQUpPFJKOYO/G4gEYUeBOg8ymU5nKFq4hab+Ckc+HHlX0GgSOK+GwLkyZMIn6g9QE2TV+rNQFYvGP/Gzafrd7dmi5YT6Ji8/jCNawIDAQAB" )  ; ----- DKIM key default for yourdomain.com
整理内容为一行并添加 HostName 为 default._domainkey 的TXT记录
Type   Host    Destination              Priority       TTL
TXT    default._domainkey     v=DKIM1; k=rsa; p=MIGfMA0GCSqGSIb3DQEBAQUAA4GNADCBiQKBgQDaJp4t7CUdK925qyqPnNtqM5cSvAfzQJSX3WPafluRBHtB62whHuD7GsKRW4XZmifqnGOtMYQUpPFJKOYO/G4gEYUeBOg8ymU5nKFq4hab+Ckc+HHlX0GgSOK+GwLkyZMIn6g9QE2TV+rNQFYvGP/Gzafrd7dmi5YT6Ji8/jCNawIDAQAB                       3600

Type   Host    Destination              Priority       TTL
TXT    _dmarc  v=DMARC1; p=none; rua=mailto:postmaster@yourdomain.com                      3600

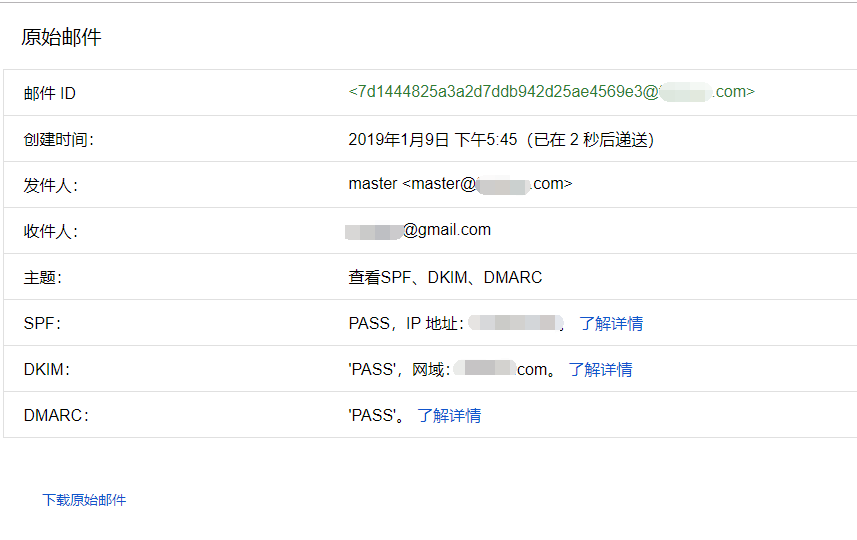
至此SPF、DKIM、DMARC均已设置完毕,可以通过发信给Google,然后查看原始邮件这三项是否都为PASS,由于当前操作服务器未开通SMTP,所以图片是另一台开通的邮件服务器发送的。
Roundcube的安装与使用
[root@mail keys]# cd /var/www
[root@mail www]# wget https://github.com/roundcube/roundcubemail/releases/download/1.3.8/roundcubemail-1.3.8-complete.tar.gz
[root@mail www]# tar -xvf roundcubemail-1.3.8-complete.tar.gz
[root@mail www]# chown -R apache:apache roundcubemail-1.3.8
编辑 /etc/httpd/conf.d/vhost.conf
    DocumentRoot "/var/www/squirrelmail.devel/"
    ->
    DocumentRoot "/var/www/roundcubemail-1.3.8/"
重启服务httpd
[root@mail www]# systemctl restart httpd
Step 1.
[root@mail www]# yum install php-xml -y
[root@mail www]# yum install php-mysql -y
[root@mail www]# yum install php-mbstring -y
重启服务httpd
[root@mail www]# systemctl restart httpd
Step 2.
安装数据库
[root@mail www]# yum install mariadb-server
[root@mail www]# systemctl enable mariadb
[root@mail www]# systemctl start mariadb
[root@mail www]# mysql -uroot -p
Enter password:                     #直接回车
MariaDB[(none)]> SET password=PASSWORD('newpassward');
Query OK, 0 rows affected (0.00 sec)

MariaDB [(none)]> create database roundcubemail;
Query OK, 1 row affected (0.00 sec)

MariaDB [(none)]> show databases;
+--------------------+
| Database           |
+--------------------+
| information_schema |
| mysql              |
| performance_schema |
| roundcubemail      |
| test               |
+--------------------+
5 rows in set (0.00 sec)

MariaDB [(none)]> create user roundcubemail@localhost identified by 'roundcubemail';
Query OK, 0 rows affected (0.00 sec)

MariaDB [(none)]> grant all privileges on roundcubemail.* to roundcubemail@localhost identified by 'roundcubemail';
Query OK, 0 rows affected (0.00 sec)

MariaDB [(none)]> exit
Bye
配置网站并生成配置文件,涉及到地址的尽量将localhost更改为127.0.0.1
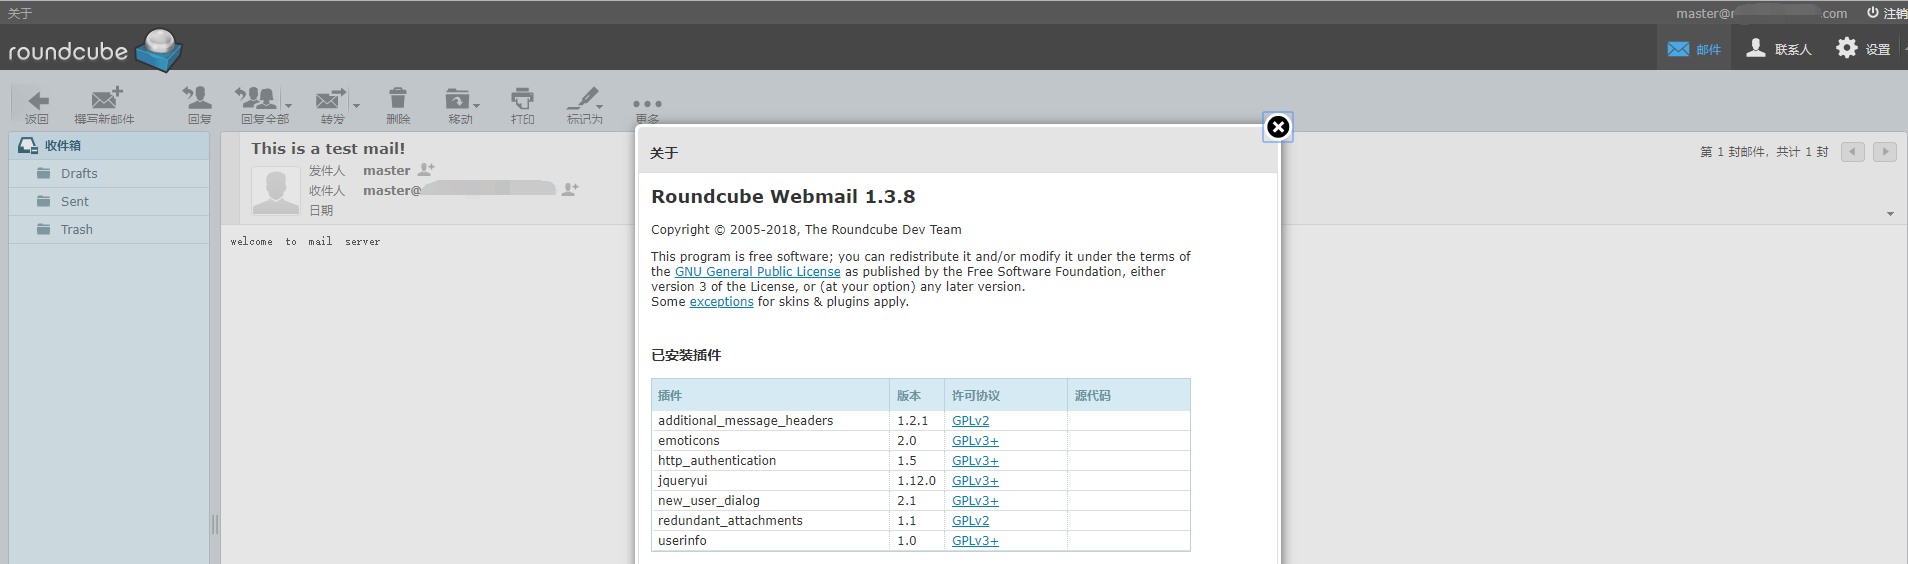
注意,插件additional_message_headers一定要选。
The config file was saved successfully into /var/www/roundcubemail-1.3.8/config directory of your Roundcube installation.
Step 3.
进入下一步会提示数据库未初始化点击初始化即可
测试SMTP设置(填写发件人和收件人)
Server 127.0.0.1
Port 25
Username (none)
Password (none)
Trying to send email…
SMTP send: OK
测试IMAP设置(使用你的邮箱账户)
Connecting to 127.0.0.1…
IMAP connect: OK(SORT capability: yes)
所有测试项均提示OK则表示网站已经可以开始提供服务,可以正常打开http://mail.yourdomain.com了,不过这里还有一些事项需要注意。
打开 /var/www/roundcubemail-1.2.9/config/config.inc.php 找到下面项,没有的项需要添加。(192.168.0.1请替换为服务器外网地址)
additional_message_headers 项是为了邮件更符合群发规则
mail_domain 项是为了让发件人身份不为IP地址,如果在设置前就登陆了导致发件人地址异常的可以在修改下列配置后修改/删除数据库内的对应信息
$config['default_host'] = '192.168.0.1';
$config['mail_domain'] = '%d';

$config['additional_message_headers']['List-Unsubscribe'] = '<http://mail.yourdomain.com/unsubscribe.php?unsubscribe=1>, <mailto:unsubscribe@yourdomain.com?subject=unsubscribe>';
下面使启用的插件,建议启用 new_user_dialog 这样可以在第一次登陆时可以合适邮件地址是否正确。
$config['plugins'] = array('additional_message_headers', 'emoticons', 'http_authentication', 'new_user_dialog', 'redundant_attachments', 'userinfo');
配置完毕后请删除installer目录或者修改权限使其无法访问以免信息泄露
如果服务器未开通SMTP服务的,可以尝试多创建几个本地邮箱账户进行发信测试
如果邮件服务供多人使用的,应当关闭编辑发信人身份的功能
参考文档:
1. https://hostpresto.com/community/tutorials/how-to-setup-an-email-server-on-centos7/
2. https://www.linuxtechi.com/configure-domainkeys-with-postfix-on-centos-7/
备注:
1. 如果主机名没有变更的情况下生成的opendkim密钥可能是无效的,所以请参考下列语句进行处理:
mkdir /etc/opendkim/keys/yourdomain.com
opendkim-genkey -D /etc/opendkim/keys/yourdomain.com/ -d yourdomain.com -s default
chown -R opendkim: /etc/opendkim/keys/yourdomain.com
mv /etc/opendkim/keys/yourdomain.com/default.private /etc/opendkim/keys/yourdomain.com/default
声明:本文章所提供之内容仅用于学习与研究,切勿用于非法用途!
转载请保留链接或注明出处
Hits: 7597
